How a winger can best utilize his options when exiting the D-zone
In the coming years, hockey fans are going to hear more about zone entries and zone exits. It’s always been a huge focal point for coaches (I don’t think I played for a single one who didn’t draw lines five feet on either side of both blue lines in a pre-game talk to say, “Here’s where we’re extra cautious with the puck”), and the stats that highlight those teachings are starting to surface with increasing frequency.
Why zone exits - which I’ll focus on in this piece - are important is pretty obvious. Getting the puck out forces your opponents to tag up and allows your D to reset. Turning it over keeps your team running around, tired, and playing around your own net.
While everyone plays an important role in getting the puck out of the zone, the onus usually falls on the winger to make the crucial play that determines whether your team’s heading on a rush, or doomed to a shift hemmed in your own zone.
The basic roles of defensemen and centers during breakouts are pretty consistent from team to team, so below is a look at the options with which wingers are generally provided when they get a puck on the wall, and a few ways to make successful zone exits easier for themselves.
Ways for wingers to make their lives easier
Get low … or get high
A common mistake of wingers (well, of almost every forward) is giving in to their desire to get ahead of the play. You know where the play is headed, so you might as well get there, right?
Well, no. By playing higher in the D-zone on breakouts, you put yourself into traffic, which gives you less time to make a play, forces the D-man to make a harder pass, and puts you first in the queue of players due to get Kronwalled.
So, get low, open up, and pivot towards the boards.
If that’s not feasible - say, on a hard rim coming around your side - get yourself up to the opposing D-man at the blue line and prepare yourself for a puck battle where you only have to move the scrum a foot or two to clear the zone.
Get your feet moving and your head up
If you’ve taken the “get low” option and you’ve received the puck, the first thing on your checklist is to get moving up ice, and get your head up. Think Kessel and kick the quicksand.
By starting to skate, you put pressure on the opposition to cut you off, which drags defenders away from teammates, and opens up lanes. The “head up” part goes hand in hand, as you don’t want to miss an obvious play (maybe your linemate snuck behind their D?), and you don’t want to skate into Jordin Tootoo barreling down at 140 mph directly off the bench.
The options
Every team has different breakouts that they use depending on the situation, but as a winger on the wall who just received the puck during a standard play, you’re like a quarterback with three or four basic reads to make before you panic to the check-down option: high and hard out of the zone.
So! You’re in possession of the puck skating up the wall in your D-zone.
#1
The weak side winger is likely driving across the ice high to push back the opposing D and make room for you. If the D doesn’t back out, well, here you go:
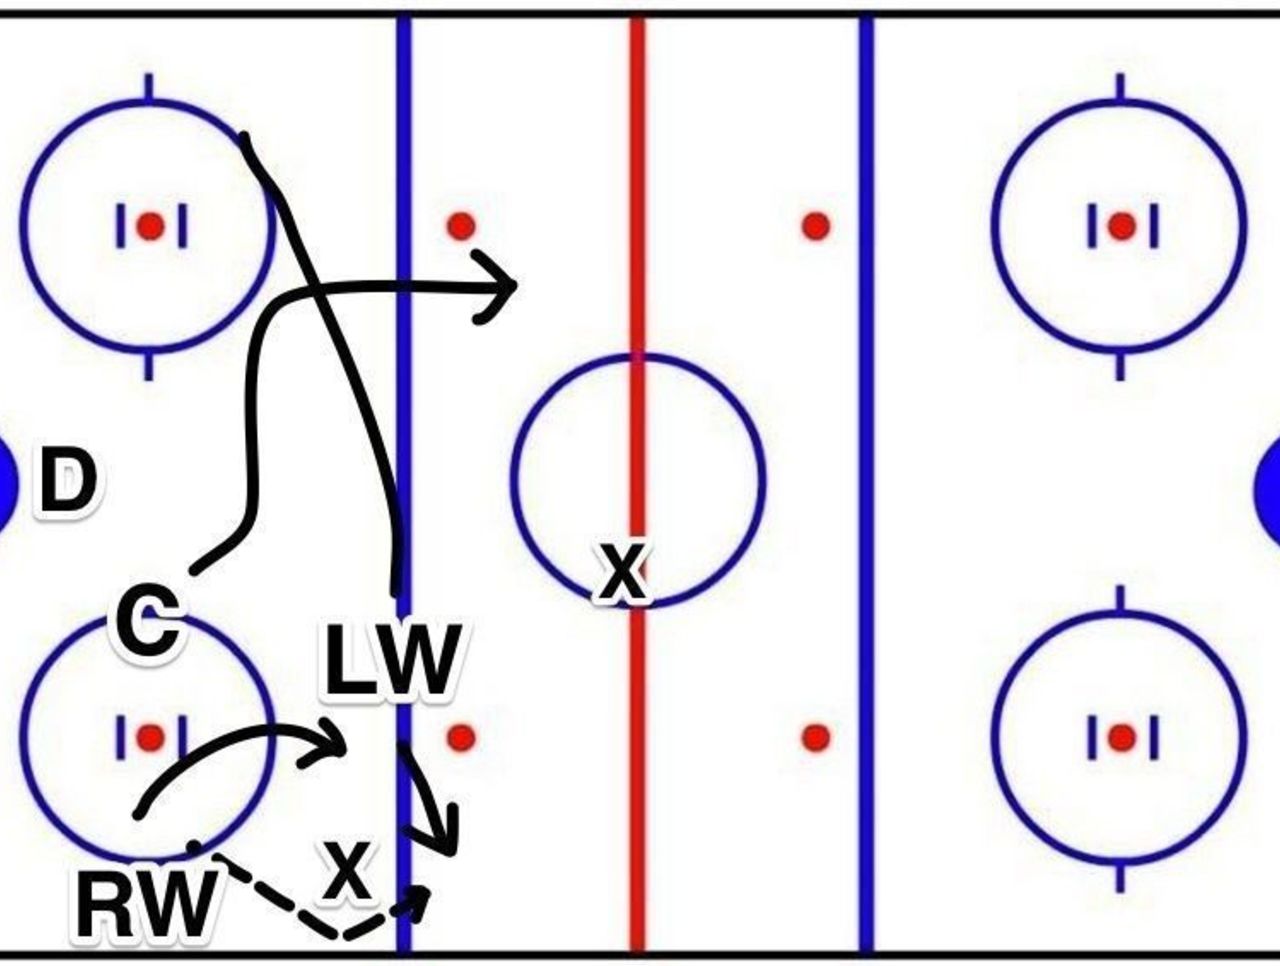
You can soft chip it by the D-man to an area that allows your linemate to skate into it, or hit him directly if that’s an option.
#2
Your center has been playing low, so he’s looking to provide level support for you, in the middle of the ice. You can get it to him directly, or if pressured, with a soft chip (assuming the opposing left D-man has backed off thanks to your streaking winger):
Note: In some situations, the left winger won’t come across the ice, instead choosing to stay wide. That’s a read and react situation, and usually happens when the center and right winger already have their speed up, to go along with the puck.
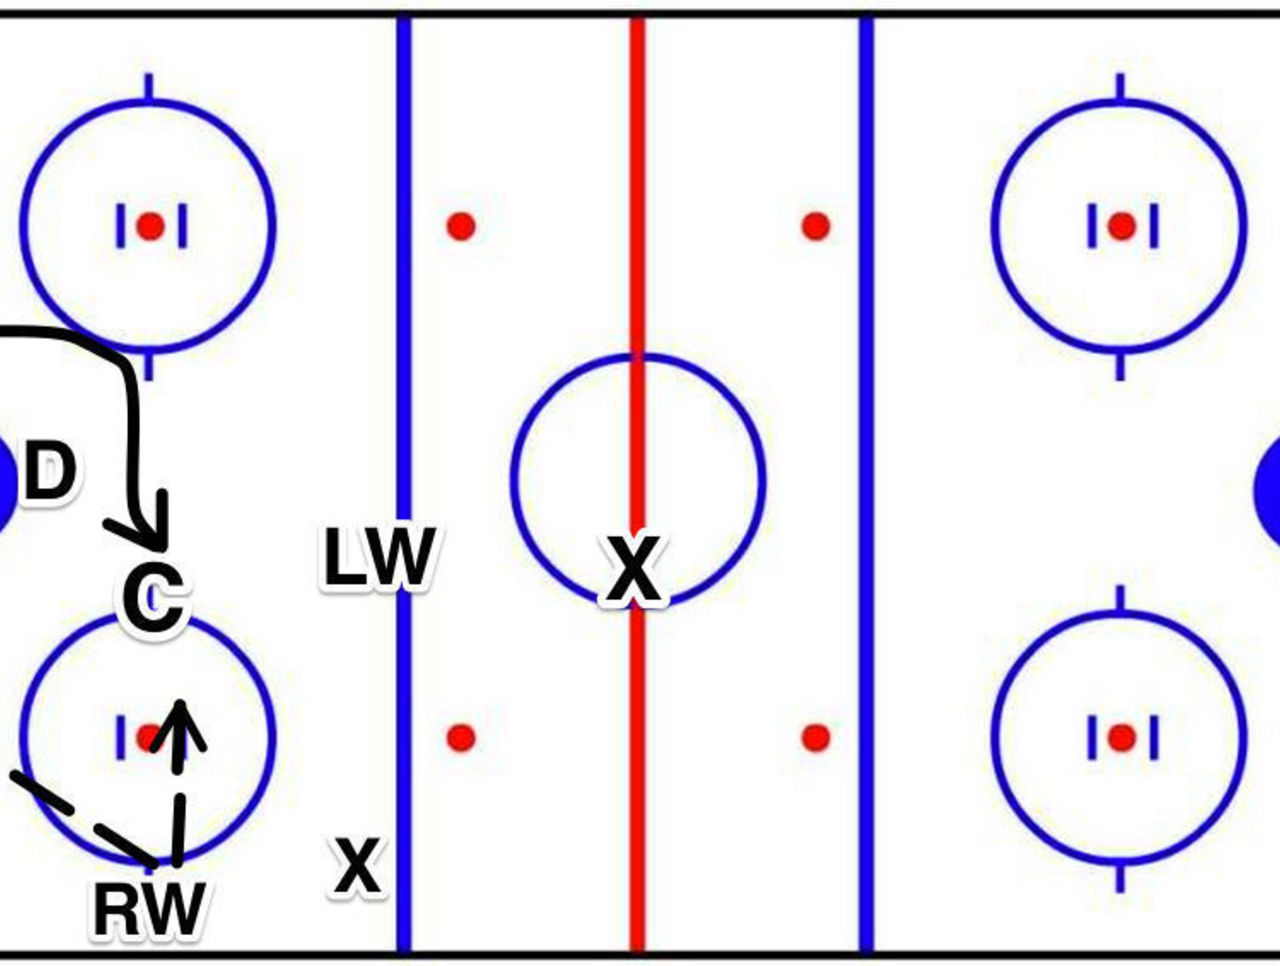
#3
Naturally, skating the puck out is a good place to start, too.
If all these options are unavailable, that’s when you look to the big red button options (something I’ll be writing about more in the coming weeks): #4, using the late D-man in front of your own net (which one team in particular does extremely well), and #5, the basic “off the glass and out."
The worst-case scenario, #6, is to eat it along the boards, rather than opt for the panic giveaway to the opposing D.
Not being a good player along the wall in your own zone is enough to keep a winger from advancing leagues. There are always a few guys in the minors who put up great numbers but who can never seem to take the next step. Being consistently poor at stuff like this can sour NHL clubs on some pretty skilled dudes.
With the emergence of zone exits and entry statistics, we should be able to highlight those who excel and those who don’t when it comes to the crucial area of ice around the blue lines. While many players see their abilities in those areas reflected in their possession stats and more, it’ll still be nice to highlight who consistently makes good - and smart - plays in those pressure moments.
For teams protecting a late lead, the knowledge could become invaluable. There’s a reason they’re thirsting for more information, after all.
HEADLINES
- Schaefer's historic season, Team Canada GM options, more NHL hot topics
- MacKinnon notches 3 points as Avs become 1st team to clinch playoff spot
- Don't expect Canada's long Stanley Cup drought to end this year
- Nikishin scores in OT to lift East-leading Hurricanes past Maple Leafs
- Bargains and burdens: Best, worst value contracts of 2025-26 season